Showing posts with label Science. Show all posts

Monday, August 27, 2012

Recycled Cookie Sheet for Groups - Green Theme Day 2


So here it is, my upcycled cookie sheet. :) I had seen how you could use cookie sheets in the classroom on Pinterest since they're great with magnets, so I was super happy when I got my hands on an old one at Goodwill the other day.

What I Did:
1) Washed it of course
2) Primed it white
3) Added masking taped strips evenly
4) Painted the lines without tape with acrylic green and let dry
5) Removed the tape and airbrushed the rest a light mint green color
6) Designed four large circles on the computer using JW Illustrations HippieChic Papers (I made sure to take measurements. My circles are split through the middle because I teach two classes - my homeroom (Carro) and my partner teacher's homeroom (Greenleaf). Hence all the Cs and Gs.
7) I also created numbers 1 through 4 for my four different science groups. I pasted them onto the board and then added Mod Podge - BIG MISTAKE! I still keep trying to use Mod Podge on copying paper. It always wrinkles it. I need to remember to use card stock.
8) Made Avery labels for each student's number and stuck them to thin water bottle caps.
9) Attached magnets to the opposite sides and now I've got changeable grouping!

I do science groups, so I'll be using this for that. I attached the cookie sheet to one of my metal doors using strong circle magnets.

 Stay tuned. More green theme stuff to come!


Thursday, June 28, 2012

New FB Page & I Have a Green Baby!

Just wanted to share this little ball of green that brings a smile to my face every morning. :)


Also, I've started a Green Classroom FB page. I hope you'll join it, and please let me know of any way you would like to share or collaborate here with tips you have on being a green teacher. Together we can make a difference! Teachers are super significant!


Thursday, May 31, 2012

Going Green with a Garden

We are starting a farming/gardening initiative at our school next year! I am so excited and think it's a super great idea because children (myself included) are so far-removed from the process of making food nowadays.

My husband and I just started the venture of square foot gardening this summer, and today we picked our very first produce - a long, fat zucchini! And I have to be honest, it was like having a baby! It was a miracle to me!

I have had no idea about any of this gardening stuff - how each plant will grow, where to find the fruit and vegetables on a plant, and when and how to harvest them. It's a lot! Thank God for YouTube! And my mom! So here's some pics of my green garden. It's not in the classroom yet, but it will be!

One of our four raised gardens my husband made for us

Baby eggplant!

Daddy zucchini!

Almost ready!

A flowering plant given to me by a student. Look how it's ready to blossom - just like our students!

Beets

Corn

Cucumber blossoms

And Basil blossoms


Have a great, green summer!

Wednesday, March 14, 2012

Vocabulary Recycling Soccer Match!

So, I snagged this cute idea on Pinterest from the Making Learning Fun Blog on converting strawberry baskets into hockey goals and having students practice skills with bottle caps. Here in the South I decided to make them soccer goals, not hockey :P.


Here's what I did for this fun game that really kept my Spanish immersion students engaged in practicing some tough science vocabulary on light.

Preparation:

1) A student brought in two plastic strawberry baskets.  I cut one side off of each, so they could be positioned like soccer goals.

2) Then I made some Avery #5410 labels with our light unit vocabulary. I put the definitions on tops of bottle caps and the terms on the inside of the caps.


Rules of the Game:

1) To play, students place the "goals" on opposite ends of the table.
2) Taking turns, they choose a bottle cap, read the definition, and name the corresponding term.

3) They check their answer on the inside of the cap, and if correct, they can take a shot at their opponent's goal by flicking the cap with their finger. If it goes in, they win the cap. If it doesn't, they return it to the pile. If they don't know the definition, they return the cap, and it's the next person's turn.


(Casi! The heart box in the background serves as the storage container for the caps.)

4) Continue playing until all caps have been won. The winner with the most caps wins.

This game is fun, free (except for the Avery labels), and good for the environment. Give it a try!

Saturday, January 21, 2012

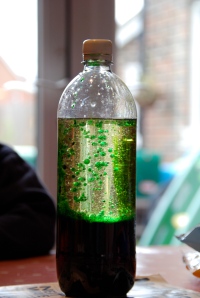
Turn Plastic Bottles into Magical Learning!

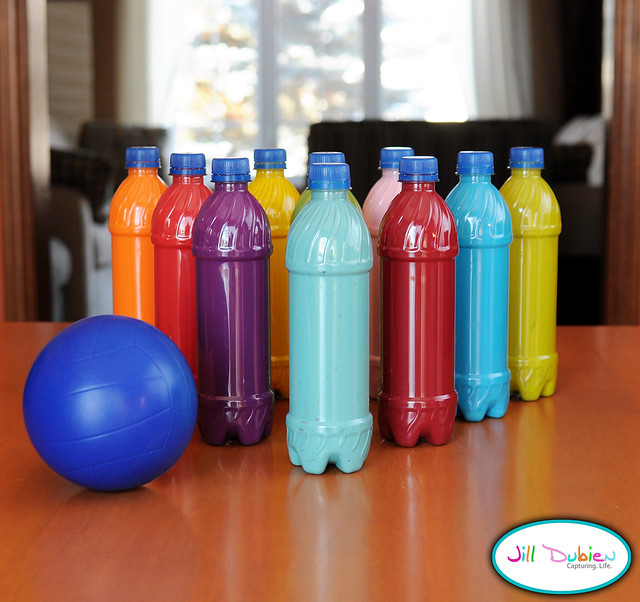
There is never an excuse for throwing away plastic bottles because there is always a reason to use them in your classroom. There are so many fantastic resources out there by super creative individuals for turning bottles into educational tools, and in this post I will try to touch on as many as I know about. So, peruse the ideas below and start saving your bottles!


DISCOVERY BOTTLES ARE THE BOMB!
So much fun! All you need are bottles some kind of fun material (rice, pom-poms, sprinkles, etc.). I got my start from Tunstall's Teaching Tidbits who has the mother of all posts on discovery bottles. You'll need to scroll down to see the post because I'm having issues with the actual post showing up.


DSC_0274 copy-cs3-blog


Do you have an awesome classroom activity involving bottles? Please link it up here - http://yourgreenclassroom.blogspot.com/p/bottles.html?zx=8aed6731523b0be9.

And please feel free to link up any other green classroom ideas anywhere you see fit in this blog!

Like to guest blog? I would love for you to at The Green Classroom! Please let me know at tabitha@flapjacklapbooks.com.


Saturday, December 10, 2011

Soda Bottle Rain Gauges (Catchers)

Have fun catching rain with soda bottle rain gauges (catchers).


1) All you need is a small or large soda bottle. Cut the mouth off at the top where the bottle starts becoming smaller.

2) Afterwards, take the mouth of the bottle and flip it down inside the bottles to serve as a funnel for the pebbles.

3) Add small pebbles to the bottom of the bottle through the funnel top to give the bottle some weight.

4) Start marking the bottle with a permanent marker using centimeter or inches. * Be sure to start the markings above the bottom grooves of the bottle so you will have a consistent reading.

5) Do a rain dance and see what happens!


Obviously these rain gauges are not a standard measure, but they will give students a physical demonstration of what one is.

Happy Recycling!

Related Posts Plugin for WordPress, Blogger...